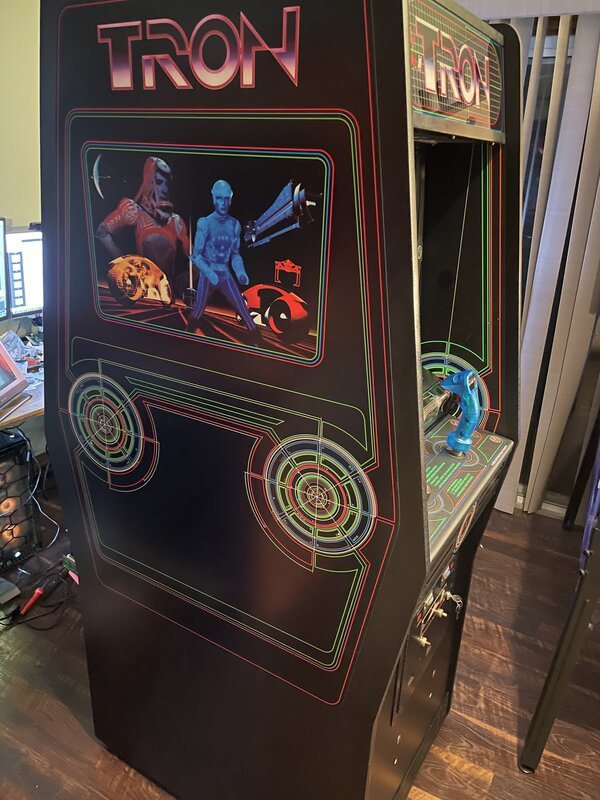
The hum of a CRT monitor, the click of a joystick, the iconic glow of the Grid – for many, the mere thought of a TRON arcade cabinet evokes a powerful surge of nostalgia. It's more than just a game; it's a piece of cinematic history, a monument to the golden age of arcade gaming. If you’ve ever dreamed of owning one of these beauties, perhaps even bringing a long-dormant machine back to its former glory, you're not alone. Collecting and restoring TRON arcade cabinets is a deeply rewarding endeavor, a hands-on way to preserve digital heritage and own a tangible piece of pop culture.
But where do you even begin? Taking on a restoration project can feel daunting, whether you’ve found a forgotten cabinet in a dusty corner or just acquired one in less-than-perfect shape. This comprehensive guide will walk you through every critical step, from the initial assessment to the thrilling moment you power up your revitalized machine, ready to face the Master Control Program once more.
At a Glance: Your TRON Restoration Journey
- Why Bother? Preserving a cultural icon, reliving gaming history, and creating a unique showpiece.
- First Steps: Thoroughly inspect the cabinet, control panel, monitor, and electronics for damage. Document everything!
- The Strip Down: Carefully disassemble, clean, and photograph each component. Patience is key.
- Rebuild & Replace: Tackle wood rot, refresh the control panel, repair or replace the monitor, and address electronics issues.
- Hunting for Parts: Leverage online communities, specialty retailers, and marketplaces for authentic or reproduction components.
- Final Assembly: Reconstruct your cabinet meticulously, test all functions, and enjoy the fruits of your labor.
- Cost & Time: Expect a range from a few hundred dollars for minor fixes to several thousand for a full overhaul, demanding significant time and dedication.
The Call of the Grid: Why Restore a TRON Cabinet?
Imagine walking into a room and seeing the vibrant blue and yellow lines of a TRON cabinet, ready to transport you back to the digital frontier. For many, that's enough. The original TRON arcade game, released by Bally Midway in 1982, wasn't just another coin-op; it was a technological marvel that broke new ground, drawing inspiration directly from the groundbreaking Disney film. Its unique four-game format, vector-like graphics (on a raster screen), and iconic light-up joystick made it instantly recognizable and a challenge to master.
Restoring one of these machines is about more than just owning a game. It's about:
- Preserving History: You’re saving a piece of arcade lore from decay, ensuring future generations can experience gaming as it once was.
- Honoring a Classic: The TRON cabinet itself is a work of art, a testament to early industrial design. Bringing back its original aesthetic is a tribute.
- A Rewarding Project: The process demands a blend of technical skill, patience, and creative problem-solving. The satisfaction of seeing a derelict cabinet spring back to life is immense.
- Creating a Unique Piece: A restored TRON cabinet becomes a focal point, a conversation starter, and a functional piece of art in your home or game room.
Understanding what makes this particular cabinet special fuels the dedication required for restoration. Its legacy is deeply intertwined with gaming evolution and cinematic achievement, a true cross-media sensation. Before diving deeper into the specific steps, take a moment to Explore the TRON arcade game itself and appreciate its enduring impact.
First Scan: Assessing Your Cabinet's Condition
Before you even think about pulling out a screwdriver, you need to play detective. A thorough assessment is the single most critical step in your restoration journey, evaluating the cabinet’s current state and helping you map out the work ahead. Think of it as your initial system scan before entering the Grid.
Key Areas to Inspect Like a Pro:
- The Cabinet Shell: More Than Just a Box
- Wood Rot & Water Damage: Pay close attention to the bottom edges, corners, and areas around the coin door. Decay due to moisture is a common culprit. Look for soft spots, discoloration, or crumbling wood.
- Warping & Structural Integrity: Is the cabinet square? Are panels bowing? Check for loose joints or missing fasteners that could indicate structural weakness.
- Cosmetic Damage: Scratches, dings, missing T-molding (the plastic trim around the edges), faded side art, or peeling decals. This affects the final aesthetic.
- Originality: Note if any parts seem non-original or have been poorly repaired in the past.
- The Control Panel: Your Interface with the Grid
- Buttons & Joystick: Test functionality. Are they sticky? Do they register inputs consistently? Is the iconic rotary joystick stiff, loose, or broken? Are the fire buttons responsive?
- Overlay & Artwork: The control panel overlay (CPO) is often heavily worn. Look for scratches, bubbling, or peeling. Is the artwork still vibrant, or is it faded and chipped?
- Electrical Connections: Flip the control panel up (carefully!) and check the wiring. Are connections secure? Are there any exposed wires or signs of corrosion?
- The Monitor: The Window to the Digital World
- Screen Condition: Inspect for cracks, deep scratches, or delamination.
- Burn-In: This is crucial. Burn-in appears as ghostly outlines of static images (like the game's score display or attract mode elements) permanently etched into the screen. Moderate to severe burn-in can necessitate replacement or extensive repair.
- Discoloration: Are colors distorted or washed out? Is there a noticeable tint? This could indicate issues with the CRT tube or associated electronics.
- Functionality: If you can power up the cabinet, observe the picture quality, brightness, and geometry.
- Safety Note: CRTs hold high voltage even when unplugged. Do not poke around inside a powered-on or recently powered-off monitor unless you are trained and understand discharge procedures.
- The Electronics: The Heart of the Machine
- Wiring Harness: Check for frayed wires, brittle insulation, loose connectors, or signs of rodent damage.
- Power Supply: Look for bulging capacitors or scorch marks, indicating failure.
- Game Boards (PCBs): Inspect for corrosion (especially if stored in damp conditions), missing components, cracked solder joints, or evidence of previous botched repairs. A basic understanding of electronics will help here, but detailed diagnosis often requires specialized tools and knowledge.
- Coin Mech & Speakers: Test if coin mechanisms work (or if they’ve been bypassed) and if the speakers produce clear sound.
Documentation is Your Best Friend: Take dozens of photos from every angle before touching anything. These will be invaluable during reassembly. Jot down notes about every defect, missing part, or unusual finding. This creates your restoration blueprint.
Common Problems & Initial Thoughts on Solutions: - Wood Rot: If minor, you might be able to repair it with wood hardeners and fillers. For extensive rot, panel replacement (often the entire bottom or side panel) is necessary.
- Monitor Issues: Minor burn-in might be livable, but severe cases require a dedicated CRT repair specialist (rare and expensive), a full CRT replacement (if you can find one), or a modern LCD conversion (less authentic but practical).
- Control Panel Wear: Worn buttons and joysticks are easily replaced with new parts. Overlays are trickier; finding accurate reproductions is key.
- Electrical Issues: This is often the most intimidating but solvable. Loose connections can be re-soldered, broken wires repaired, and bad components (like capacitors) replaced. If board-level repair is beyond your comfort level, consider sending PCBs to specialized repair services.
De-Rez and Disassemble: Stripping Down for Success
With your assessment complete, it's time to begin the careful process of disassembly. This isn't just about taking things apart; it's about systematically deconstructing the cabinet to access every area for cleaning, repair, and replacement. Think of it as preparing your digital avatar for a system upgrade – everything needs to be taken down to its core components.
Preparation is Power:
- Gather Your Tools: You'll need a standard set of Phillips and flathead screwdrivers, pliers, wire cutters, a socket set, a utility knife, and possibly a soldering iron if you anticipate electrical repairs early on.
- Protect Your Workspace: Lay down a large tarp or cardboard sheets. Restoration can get messy with dust, paint flakes, and old grime.
- The Golden Rule: Photograph Everything! This cannot be stressed enough. Take photos of:
- The overall cabinet from all sides before starting.
- Every connection before you unplug it.
- How wires are routed and bundled.
- The position of brackets, screws, and hardware.
- The order in which panels come apart.
- Any unique markings or labels.
- Seriously, take more photos than you think you need. Your future self will thank you.
- Label Everything: As you disconnect wires, use masking tape and a marker to label both ends (e.g., "Jamma P1" and "P1 connector on board"). For screws and hardware, put them in small, labeled baggies.
The Disassembly Sequence (General Order):
- Marquee & Light: Carefully remove the marquee glass or plexiglass, then the fluorescent light fixture.
- Coin Door: Disconnect the wiring, then unbolt the entire coin door assembly.
- Control Panel: Disconnect the joystick and button wiring harness, then unbolt and lift off the control panel assembly. Often, it hinges up.
- Monitor: This is often heavy and delicate. Disconnect all wiring (paying extreme attention to the high voltage anode cap on the CRT – ensure it's discharged safely if you're working on the monitor chassis), then carefully unbolt and remove the monitor assembly. Get help for lifting if it’s a large CRT.
- Game Boards & Power Supply: Disconnect the Jamma harness (if present) or other wiring from the main PCB(s) and power supply. Unbolt and remove these components.
- Speakers & Other Peripherals: Disconnect and remove any speakers, transformers, or other ancillary electronics.
- Cabinet Panels: Finally, you can begin to systematically unbolt and remove individual cabinet panels if extensive woodworking is required. Work carefully to avoid further damage.
Initial Cleaning: Dust Bunnies to De-Rezzed Grime
Once everything is disassembled, it's time for the first round of cleaning. - Vacuum: Use a shop vac to suck up decades of dust, spiderwebs, dead insects, and debris from inside the cabinet shell and around components.
- Wipe Down: For hard surfaces, use a mild all-purpose cleaner. Test any cleaning solution on an inconspicuous area first, especially on painted or laminated surfaces, to ensure it doesn't cause discoloration or damage. For delicate parts like wiring harnesses, a gentle wipe with a damp cloth (not soaking wet) is often sufficient. Compressed air can also be useful for blowing dust out of intricate components.
This stage is surprisingly satisfying. You’ll be amazed at how much gunk can accumulate inside an arcade machine over 40 years.
Rebuilding the System: The Core Restoration Process
Now, the real work begins. This is where you transform your dismantled relic back into a gleaming, functional arcade masterpiece. Each component demands specific attention and skill.
4.1. Cabinet Rehab: From Decay to Digital Display
The wooden cabinet is the foundation. Its condition dictates much of the aesthetic outcome.
- Addressing Wood Rot: For minor rot, apply a wood hardener (an epoxy-based liquid) to stabilize the affected area. Once cured, fill any voids with wood filler or Bondo. For extensive rot, especially on bottom panels or side sections, the best approach is to cut out the damaged section and graft in a new piece of MDF or plywood, carefully glued and screwed into place.
- Filling Dents & Dings: Small imperfections can be filled with wood filler, sanded smooth, and primed.
- Sanding: Thoroughly sand all cabinet surfaces. Start with a coarser grit (e.g., 100-120) to remove old paint or smooth out repairs, then move to finer grits (220-320) for a smooth finish suitable for painting.
- Repainting & Refinishing: TRON cabinets typically feature painted surfaces with specific artwork stenciled or decaled on.
- Primer: Apply a good quality wood primer to all sanded surfaces.
- Base Coat: For TRON, the cabinet is typically a dark color, often black. Apply several thin, even coats of high-quality semi-gloss or satin paint.
- Artwork: This is where attention to detail really matters. You can hand-paint stencils if you're an artist, but most restorers opt for high-quality reproduction decals or stencils from specialty arcade art suppliers. Apply them meticulously, ensuring correct alignment. T-molding (the plastic trim around the cabinet edges) can be replaced to provide a fresh, clean edge.
4.2. Control Panel Command Center: Buttons, Sticks, and Overlays
The control panel is where players interact with the game, so its feel and appearance are paramount.
- Disassembly & Cleaning: Remove all buttons, the joystick, and the overlay. Thoroughly clean the metal or wood panel underneath.
- Button & Joystick Replacement:
- Buttons: Old, sticky, or unresponsive buttons should be replaced. Many suppliers offer authentic arcade buttons (leaf switch or microswitch) in the correct colors.
- Joystick: The TRON rotary joystick is unique. If yours is worn, stiff, or non-functional, you'll need a replacement or a rebuild kit. These can be pricier but are essential for an authentic experience. Ensure the rotary mechanism functions smoothly.
- Overlay Replacement: The original control panel overlay (CPO) is often vinyl. Find a high-quality reproduction CPO that accurately matches the original artwork and apply it carefully to a clean, smooth control panel. Use the wet method (applying with soapy water) to allow for repositioning and to prevent bubbles.
4.3. The Visual Core: Bringing the Monitor Back to Life
The monitor is often the most expensive and challenging component to restore. Its condition profoundly impacts the game experience.
- CRT Repair: If your original CRT has issues (e.g., dim picture, color problems, geometry distortion), you have a few options:
- Cap Kit: Many CRT issues stem from aging capacitors on the monitor chassis. Replacing these (a "cap kit") is a common and often effective repair. This requires soldering skills and extreme caution due to high voltage.
- Component Replacement: Other components (flyback transformer, integrated circuits) may fail. Diagnosis and replacement require specialized electronics knowledge.
- Professional Repair: If you’re not comfortable with high-voltage electronics, send your monitor chassis to a professional arcade monitor repair specialist. They are becoming rarer, but still exist.
- CRT Replacement: Finding a working, original-spec CRT monitor (like a Wells-Gardner K4900 for TRON) in good condition is increasingly difficult and costly. If you find one, ensure it's been tested.
- LCD Conversion (The Compromise): Replacing a CRT with a modern LCD monitor is a popular, more affordable, and maintenance-free option. However, it sacrifices authenticity. The picture quality and aspect ratio may differ, and it lacks the characteristic "scanlines" of a CRT. If you go this route, ensure the LCD is properly mounted and connected via a video converter board (e.g., a CGA-to-VGA scaler) to match the original game board's output.
4.4. The Digital Heart: Electronics Repair and Revival
This stage involves bringing the game's intelligence back online. It requires careful diagnosis and, potentially, specialized knowledge.
- Wiring Harness Repair: Inspect every wire. Solder any broken connections, replace frayed sections, and ensure all connectors are clean and secure.
- Power Supply: Test the power supply's output voltages. If it's failing, you can often rebuild it with new components or replace it with a modern switching power supply, ensuring it delivers the correct voltages (+5V, +12V, -5V) safely.
- Game Boards (PCBs):
- Cap Kits: Similar to monitors, aging electrolytic capacitors on game boards can cause instability. Replacing them is a common preventative measure.
- Component Swapping: For specific chip failures, you might need to desolder and replace ICs. This is advanced work.
- Send-Out Repair: Many experienced arcade board repair technicians specialize in specific game boards. If you're stuck, this is often the most reliable path.
- EPROMs: Sometimes, software issues arise from corrupt or failing EPROM chips. These can be replaced if you have access to the correct ROM files and an EPROM programmer.
4.5. Hunting for Parts: Your Digital Scavenger Hunt
Finding the right parts can be a quest in itself.
- Online Retailers: Sites like ArcadeShop, Twisted Quarter, and GroovyGameGear specialize in new arcade parts (buttons, joysticks, power supplies, repro artwork).
- eBay & Craigslist: Excellent sources for used original parts, sometimes entire donor cabinets, or hard-to-find components. Be wary of condition.
- Arcade Repair Shops: Local or online shops that specialize in arcade machine repair often have a stash of used parts or can source them for you.
- Online Forums & Communities: Websites like KLOV (Killer List of Videogames) and Arcade-Museum have active forums where collectors buy, sell, and trade parts, and offer invaluable advice. You might find someone selling a specific TRON board or monitor they no longer need.
- Reproduction vs. Original: Decide what level of authenticity you want. Reproduction parts are often easier to find and more reliable, while original parts maintain historical accuracy but can be rare and costly.
Final Assembly & System Check: Returning to the Grid
With all components repaired, cleaned, or replaced, it’s time to bring your TRON cabinet back together. This is where those meticulous photos and labels really pay off.
- Reassembly in Reverse: Carefully follow your disassembly photos to reassemble the cabinet. Take your time, double-checking every connection and screw.
- Mount the game boards and power supply.
- Install the monitor (again, safely!).
- Attach the control panel, reconnecting all joystick and button wiring.
- Install the coin door, speakers, and marquee light.
- Close up the cabinet panels.
- Initial Power-Up (The Moment of Truth):
- Before turning it on, do a final visual check for any loose wires or tools left inside.
- Plug it in and flip the switch. Listen for unexpected noises, look for smoke. Be prepared to immediately power off if something seems wrong.
- If it boots, celebrate!
- Thorough Testing:
- Game Play: Test every button and joystick direction. Play a full game to check for intermittent issues.
- Coin Mech: Ensure coins register or that the credit button works.
- Sound: Verify both speakers are working and the sound quality is good.
- Monitor Calibration: Adjust brightness, contrast, and geometry settings on the monitor chassis for the best picture (use a service manual if available).
- Final Polish: Give the entire cabinet a final cleaning, removing any fingerprints or dust. Stand back and admire your handiwork. Your TRON cabinet is ready to light up your game room.
The Budget Byte: Understanding Restoration Costs
The cost of collecting and restoring TRON arcade cabinets varies wildly, a spectrum stretching from a few hundred dollars for simple clean-ups and minor component swaps to several thousand for a complete, from-the-ground-up overhaul.
Factors Influencing Cost:
- Initial Cabinet Condition: A "barn find" riddled with wood rot, a dead monitor, and non-functional boards will obviously cost more than a cabinet that just needs new buttons and a good cleaning.
- DIY vs. Professional: Doing the work yourself saves significantly on labor costs, but you'll still pay for parts. Hiring professionals for tasks like monitor repair or PCB troubleshooting adds a substantial fee.
- Parts Sourcing:
- Monitor: This is often the biggest expense. A good working original CRT can be hundreds, if not over a thousand, dollars. A professional repair of a chassis can be $200-$500+. An LCD conversion kit might run $150-$300.
- Game Boards: A non-working main PCB might cost $50-$200, plus another $100-$300 for repair. A fully working board could be $300-$800+.
- Control Panel Components: A new TRON rotary joystick alone can be $100-$200. Buttons and leaf switches are relatively inexpensive ($5-$15 each).
- Artwork: Reproduction side art, control panel overlays, and marquee graphics can range from $200-$500 for a full set.
- Cabinet Materials: Wood fillers, sanding supplies, paint, and T-molding are relatively minor costs, usually under $100-$200.
- Tools: If you don't already own basic hand tools, a soldering iron, a multimeter, and a shop vac, factor these into your initial budget.
Rough Estimates: - Minor Refresh (Clean, new buttons/joystick, minor paint touch-up): $300 - $800
- Moderate Restoration (New artwork, control panel, monitor cap kit, basic PCB repair): $800 - $2,000
- Full "Showpiece" Restoration (Extensive cabinet repair, new monitor/LCD, professional PCB repair, full artwork replacement): $2,000 - $5,000+
Remember, this isn't just a financial investment; it's an investment of time, passion, and learning.
Common Questions from the Grid
How long does a TRON cabinet restoration typically take?
It varies immensely. A simple clean-up and parts swap might take a weekend. A full, down-to-the-wood restoration with PCB repairs could easily take months, especially if you're waiting for specialized parts or professional services. Factor in evenings and weekends for DIY work. Patience is truly a virtue here.
Do I need electrical engineering experience to restore one of these?
Basic electronics understanding (like how to safely test continuity with a multimeter or identify a capacitor) is incredibly helpful. For more complex tasks like soldering a cap kit or diagnosing board-level failures, you'll either need to learn the skills, get help from an experienced friend, or outsource that specific work to a professional. Never work on live arcade electronics, especially CRTs, without understanding safety protocols.
Where do I find original artwork or high-quality reproductions?
Original artwork is incredibly rare and usually found only on other cabinets. For reproductions, your best bet is online specialty retailers that focus on arcade restoration parts. Many now offer digitally recreated, screen-accurate vinyl decals for side art, control panels, and marquees. Check arcade forums for recommended vendors.
Is restoring a TRON cabinet worth it financially?
Purely as a financial investment, it's often a losing proposition. The cost of parts and your time usually exceeds the resale value of a restored machine, unless you're starting with a free or very cheap cabinet. However, the personal value – the joy of bringing it back to life, the satisfaction of playing it, and the pride of ownership – is immeasurable for collectors. It's a passion project, not a get-rich-quick scheme.
What if I get stuck on a specific repair?
Don't despair! The arcade collecting and restoration community is incredibly supportive. Online forums (like KLOV, Arcade-Museum) are filled with experts who love to help. Post detailed photos and descriptions of your problem, and you'll often find someone willing to offer advice or even repair services.
Your Legacy on the Grid
Collecting and restoring TRON arcade cabinets is more than just a hobby; it’s a commitment to preserving a vibrant piece of digital history. It’s a project that combines technical skills, artistic flair, and a deep passion for retro gaming. You’ll learn about woodworking, electronics, graphic design, and problem-solving, all while connecting with a dedicated community of fellow enthusiasts.
It demands patience, meticulous attention to detail, and a willingness to learn new skills. There will be frustrating moments, tricky repairs, and unexpected challenges. But pushing through those difficulties, armed with the right guidance and the collective wisdom of the community, will lead to an incredibly rewarding experience. When you finally power up your fully restored TRON cabinet, watch the game load, and grasp that iconic joystick, you're not just playing a game; you're celebrating a legacy, and you’ve helped keep gaming history alive, one byte and one board at a time. Now, go forth and program!